Exfoliating your lips is like a mini spa day for your mouth, and learning how to make exfoliating lip scrub is a rite of passage for anyone who treasures soft, kissable lips! This magical concoction can transform your pout from flaky and dull to fabulously smooth and luscious with just a few simple ingredients. Plus, the best part? You can totally customize it to suit your style and taste. So, grab your favorite mixing bowl (preferably one that matches your cute kitchen decor), and let’s dive into the sparkly world of lip scrubs!
Understanding the Importance of Lip Exfoliation
Exfoliating your lips isn’t just a beauty ritual; it’s essential self-care! Our lips are constantly exposed to various elements—sun, wind, and even dry air—which can lead to chapping and dryness. Understanding how to make exfoliating lip scrub is crucial in keeping those lovely lips hydrated and healthy. Here’s why you should definitely consider incorporating lip exfoliation into your beauty routine:
Benefits of Lip Exfoliation
- Removes dead skin: The gentle buffing from a lip scrub will sweep away dead skin cells, revealing the soft, fresh lips underneath.
- Enhances lipstick application: Say goodbye to that dry, flaky look! A smooth surface makes lip products apply evenly and look fabulous.
- Promotes hydration: Exfoliating increases blood circulation in the lips, promoting better absorption of hydrating products that follow, like lip balms or oils.
- Boosts confidence: Let’s be real—soft, smooth lips just feel amazing. You’ll be more likely to flaunt that pout!
With all these incredible benefits, learning how to make exfoliating lip scrub is essential to your beauty arsenal.
Essential Ingredients for DIY Lip Scrubs
Let’s break down the essentials you’ll need to whip up your own exfoliating lip scrub. The great news is that most of these ingredients are probably already lounging around in your kitchen, begging to be put to good use!
Natural Exfoliants
- Sugar: A popular choice because it’s gentle yet effective! The granules are perfect for sloughing off dead skin without irritating your lips.
- Sea Salt: For those who prefer a coarser texture, sea salt is a fabulous alternative. Just be cautious not to use it too frequently, as it can be a bit intense for sensitive skin.
- Coffee Grounds: For coffee lovers, this option offers a wonderful scent while providing a fabulous exfoliating effect.
Base Ingredients
- Honey: Not only does honey act as a natural humectant (helping your lips retain moisture), but it also adds a yummy flavor to your scrub!
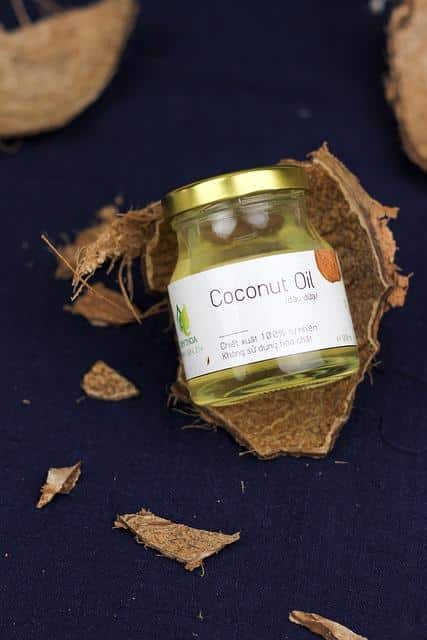
- Coconut Oil: Known for its moisturizing properties, coconut oil will leave your lips soft and hydrated.
- Shea Butter: If you want to pamper your lips, shea butter is the ultimate nourishing agent. It’s rich in vitamins and provides a silky finish.
Flavoring and Additions
- Essential Oils: A drop of peppermint or vanilla essential oil can make your lip scrub smell divine. Just remember, a little goes a long way!
- Food Coloring: Want to add a pop of color? A tiny bit of natural food coloring can turn your scrub into an eye-catching treat.
How To Make Exfoliating Lip Scrub with Step-by-Step Instructions
Ready to dive into the magic of lip scrubs? Here’s a super fun and easy DIY lip scrub recipe that you’ll absolutely love. This sugar-based scrub is as sweet as it is effective!
Basic Sugar Scrub Recipe
Ingredients:
- 2 tablespoons sugar
- 1 tablespoon coconut oil (melted)
- 1 teaspoon honey
- Optional: a few drops of peppermint essential oil
Instructions:
- Mix the Ingredients: In a small bowl, combine the sugar, melted coconut oil, and honey. Stir until well combined.
- Add Flavor: If you’re adding essential oil, now is the time! Just a few drops will suffice to give it that lovely scent.
- Check Consistency: The mixture should be crumbly yet cohesive. If it’s too dry, add a little more coconut oil; if it’s too oily, sprinkle in a bit more sugar.
- Transfer to Container: Once you’re satisfied with the texture, spoon the scrub into a small jar or container.
- Storage: Store in a cool, dry place. It can last up to two weeks when stored properly.
Customizing Your Lip Scrub
Now that you’ve mastered the basic recipe for how to make exfoliating lip scrub, let’s talk customizations!
- Add Color: For a fun twist, use natural food coloring to tint your scrub. Just a drop can take your scrub to the next level of cute.
- Switch Up the Sweetener: If you’re out of honey, agave nectar or maple syrup are fabulous alternatives.
- Infuse Flavors: Feel free to experiment with different essential oils or even a pinch of cinnamon for a spicy touch!
Tips for the Best Lip Scrub Experience
Having the right tools and techniques can make a world of difference in your exfoliating lip scrub experience. Keeping a few handy tips in mind will ensure your lips become the star of the show!
Application Techniques
- Be Gentle: When applying your scrub, use gentle circular motions to avoid damaging your delicate lip skin.
- Frequency: Exfoliating 1-2 times a week is typically enough to keep your lips smooth without overdoing it.
- Follow-Up Care: Always follow your lip scrub session with your favorite lip balm or oil to lock in moisture.
Safety First
While using natural ingredients, it’s always a good practice to conduct a patch test when trying out a new ingredient, especially if you have sensitive skin.
Conclusion on How To Make Exfoliating Lip Scrub
So, there you have it! Knowing how to make exfoliating lip scrub not only enables you to pamper yourself but also helps achieve those stunning, soft lips you’ve always dreamed about. The process is easy-peasy, and with fun variations, you can switch things up whenever you wish! Remember, your lips deserve a little love, so treat them with the care they need. Whether you go for a simple sugar scrub or one packed with flavor and colors, your pout is sure to appreciate the effort.
For more tips on skin care and beauty adventures, don’t forget to check out authoritative sources like Healthline and Women’s Health Magazine. Happy scrubbing!