When it comes to coloring hair at home, the excitement can sometimes come with a side of chaos—like colorful splatters on your walls! If you find yourself staring at a not-so-pretty mess after an ambitious dye job, you’re probably wondering, “How Do You Remove Hair Dye From Walls?” No worries, darling! I’ve got you covered with all the tips and tricks to get your walls back to their original beauty without too much elbow grease.
Understanding the Nature of Hair Dye Stains
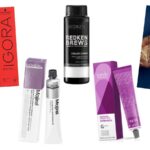
Hair dye is typically made of strong pigments that love to stick around, especially on porous surfaces like drywall. These pigments can be known to cause heart palpitations for anyone who has just experienced their handiwork! Whether you’re dealing with a vibrant red or a subtle brown, understanding the type of dye you’re working with is half the battle in knowing how to remove it. Hair dyes can be permanent, semi-permanent, or temporary, and the removal method can depend on this factor.
Common Types of Hair Dye
- Permanent Dye: This type usually penetrates the hair shaft and can be more challenging to remove from walls due to its formulation. Removing stains from permanent dyes might require more rigorous methods.
- Semi-Permanent Dye: These dyes coat the hair shaft and can sometimes be easier to remove from walls, depending on the surface material.
- Temporary Dye: If you’re feeling bold but not ready for commitment, temporary dyes wash out with shampoo and usually come off walls more easily. Lucky you!
Essential Supplies for Hair Dye Removal
Before diving into the removal methods, gather your supplies. The right tools can make cleaning those stains feel like a breeze! Here’s a little checklist:
- Baking Soda: This little kitchen superstar is a serious game-changer.
- White Vinegar: An all-natural cleaner that can cut through stains like magic.
- Dish Soap: The power of grease-fighting has never been more apparent.
- Hydrogen Peroxide: A mild bleach that’s great for tough stains.
- Rubbing Alcohol: Perfect for those stubborn residue warriors.
- Soft Cloths or Sponges: Avoid scrubbing too hard—gentleness is key here!
- Spray Bottle: For those messy concoctions you will be mixing.
Step-by-Step Guide to Removing Hair Dye From Walls
Getting into the nitty-gritty of removing those pesky stains can be quite satisfying! Here’s your loveable roadmap to success:
Initial Clean-up
Begin with a gentle wipe. Sometimes, a quick clean with a damp cloth and mild dish soap can do wonders! If the dye hasn’t set in well, this might be all you need. Here’s the quick routine:
- Mix a few drops of dish soap with warm water.
- Soak a cloth in the solution.
- Gentle rub the stain and watch as it starts to lift.
Using Baking Soda and Vinegar
For those stubborn stains that refuse to budge, it’s time to bring out the big guns. Baking soda and vinegar create a cleaning reaction that’s as satisfying to watch as it is effective:
- Sprinkle baking soda directly on the stain.
- Pour a little vinegar over the baking soda and let it fizz.
- After about 10 minutes, take a damp sponge and scrub the area gently.
- Rinse with plain water and dry with a cloth.
Hydrogen Peroxide Magic
When you’re desperate to remove those last remnants of color, hydrogen peroxide is your fairy godmother. Follow this method for optimal success:
- Dampen a cloth slightly with hydrogen peroxide (3% solution).
- Dab the stained area gently—patience is key!
- Rinse clean with water and dry.
Rubbing Alcohol for Tough Stains
Still struggling? Rubbing alcohol can be a knight in shining armor for those deep-rooted stains. Here’s how to use it effectively:
- Soak a cloth with rubbing alcohol.
- Apply it directly to the stained area and let it sit for a few minutes.
- Wipe clean with a damp cloth, and repeat if necessary.
Preventing Future Hair Dye Disasters
Now that you’ve tackled those stains like a pro, let’s ensure you don’t face this mess again! Here are some preventative measures to think about for your next dye adventure:
- Protective Coverings: Use plastic sheets or painters’ tape to protect your walls during the dyeing process.
- Wear an Apron: Getting dye on your clothes is one thing, but your walls don’t need to suffer too!
- Contain the Area: Consider setting up a dye station where spills are less likely to happen.
Additional Tips for Wall Care
Keeping your walls fresh and clean involves some extra love too! Here are a few handy tips for wall maintenance:
- Regular Cleanings: Keeping walls wiped down helps prevent buildup of stains.
- Test New Products: Always test a new cleaning product on a small, hidden area to ensure it won’t damage the paint.
- Use a Microfiber Cloth: These are gentle and effective for both cleaning and dusting.
Conclusion
Cleaning up after a hair dye disaster may feel overwhelming at times, but with the right knowledge and tools at your disposal, like how to remove hair dye from walls, you can handle the situation like a true queen! Remember, gentleness goes a long way when scrubbing, and a little peppermint in your cleaning routine can help freshen things up. Whether you stick to using baking soda or bring hydrogen peroxide into the mix, you’ve got all you need to keep your walls looking fabulous despite those colorful adventures. Happy dyeing, and may your walls remain ever so glamorous and stain-free!
For more fabulous cleaning tips, check out these resources: Cleaning Tips and Good Housekeeping.