Creating a luscious lip moisturizer is like treating your pout to a little spa day at home! Not only does it keep your lips soft and kissable, but it can also be a fun and creative process. DIY lip moisturizers are perfect for customizing your own glossy goodness while knowing exactly what goes into the mix. In this fabulous guide, we’ll dive into how to make lip moisturizer, exploring ingredients, and techniques that will have your lips saying “thank you!” So grab your favorite mixing bowl and let’s get started on this lip-loving journey!
Essential Ingredients for Lip Moisturizer
When it comes to how to make lip moisturizer, the ingredients you choose are key. Here’s a list of must-have ingredients that not only nourish your lips but also provide a fabulous finish.
Natural Oils
Natural oils pack a powerful punch when it comes to hydration. They are often the base of your lip moisturizer and provide that silky texture we all adore.
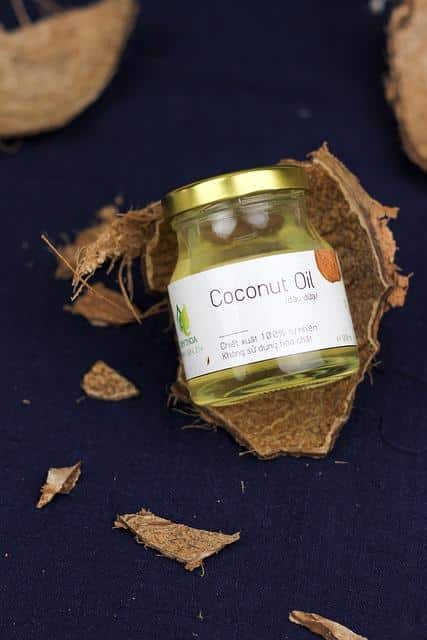
- Coconut Oil: Rich in moisturizing properties, coconut oil is a superstar ingredient that penetrates deeply to keep lips soft.
- Olive Oil: A great option for adding shine, olive oil is also an excellent source of essential fatty acids.
- Sweet Almond Oil: Perfect for sensitive skin, sweet almond oil is light and non-greasy, making it a delightful choice.
Butters
For that creamy, luscious texture, you can’t go wrong with butters.
- Shea Butter: This heavenly butter is the ultimate hydrator, making it a top choice for any DIY lip moisturizer.
- Cocoa Butter: Known for its rich scent and texture, cocoa butter not only moisturizes but also creates a nice protective layer on your lips.
Wax
To help your lip moisturizer hold its shape and provide extra protection, a natural wax is essential.
- Beeswax: A fabulous natural thickener, beeswax helps hold the balm together while providing a lovely sheen.
- Candelilla Wax: For those who prefer a vegan option, candelilla wax is a plant-based wax that works wonders in lip products.
Flavor and Color
Want to add a hint of flavor or a pop of color? These fun additions can elevate your homemade lip moisturizer.
- Essential Oils: A few drops of peppermint or vanilla essential oil can add a delightful flavor to your lip balm.
- Natural Colorants: Use beetroot powder for a rosy tint or matcha for a soft green shade.
Here’s a simple table summarizing key ingredients for easy reference:
| Ingredients | Benefits |
| Coconut Oil | Deeply moisturizing and soothing |
| Shea Butter | Provides intense hydration |
| Beeswax | Thickener and protective barrier |
| Essential Oils | Adds flavor and soothing aroma |
| Natural Colorants | For a splash of fun! |
Step-By-Step Guide to Making Lip Moisturizer
Ready to whip up your very own lip moisturizer? Follow these simple steps to create a nourishing blend that your lips will love!
Gather Your Supplies
Before diving in, gather all your supplies. It’s like prepping for a little beauty brunch!
- Heat Source: You’ll need a double boiler or a microwave-safe bowl.
- Mixing Tools: Grab a whisk or spoon, and don’t forget your tiny containers for storage!
- Measuring Tools: Accurate measurements are essential, so get a set of measuring spoons or cups.
Measure the Ingredients
To create the ultimate lip moisturizer, precise measurements are essential. Here’s a basic recipe to kick off your lip care creation:
- 1 tablespoon of Beeswax (or Candelilla wax for a vegan option)
- 2 tablespoons of Shea Butter
- 3 tablespoons of Coconut Oil
- 1 teaspoon of Essential Oil (choose your favorite)
Melting Your Ingredients
- Create a Double Boiler: Fill a pot with water, and place a heat-safe bowl on top. This gentle heating method will keep your ingredients from burning.
- Melt the Mixture: Gradually add your beeswax, shea butter, and coconut oil into the bowl. Stir gently until everything is melted and combined.
Add the Flavors
Now comes the fun part! Once your mixture is fully melted, take it off the heat and let it cool for a minute before adding your essential oils. This helps preserve their lovely aromas.
Pour Into Containers
With your mixture properly blended and cooled, pour it into small containers or lip balm tubes. Let your fabulous lip moisturizer set for a few hours at room temperature, or pop them in the fridge to speed up the process.
Label and Store
Don’t forget to label your little beauties! A sweet name like “Julie’s Juicy Lip Love” can make it even more special. Store your homemade lip moisturizer in a cool, dry place!
Benefits of Homemade Lip Moisturizer
Creating your own lip moisturizer brings a wave of benefits that store-bought products just can’t compete with.
Control Over Ingredients
By making your own lip moisturizer, you can ensure that every ingredient is natural and safe, without any weird chemicals sneaking in, which is a major win in our beauty books!
Customizable Recipes
Feeling fancy? You can totally customize your lip moisturizer to fit your unique needs! Want it super minty? Go for peppermint oil. Prefer a tropical vibe? Add some natural coconut scent!
Economical Choice
Why spend a fortune on fancy lip balms when you can whip up a fabulous one at home for a fraction of the cost? Trust me, your wallet will love you!
Environmentally Friendly
Homemade products often come with less packaging waste, making your beauty routine eco-friendly. You’ll be saving the planet one lip balm at a time!
Tips for the Best Lip Moisturizer
To up your lip balm game, here are some fab tips to remember:
Choose Quality Ingredients
Always go for high-quality, organic ingredients. This ensures that your DIY lip moisturizer is as nourishing as possible for your lovely lips.
Experiment with Textures
If you prefer a thicker or creamier balm, simply adjust your ingredient ratios. More beeswax will give you a firmer balm, while more oils will create a softer texture.
Test Your Flavor Combinations
Feel free to mix and match different essential oils and flavorings. It’s all about finding your dream combination!
Store Properly
To keep your homemade lip moisturizer fresh, store it away from direct sunlight and extreme temperatures. Proper storage makes all the difference!
Reapply as Needed
Especially in colder months, don’t be shy about reapplying your lip balm! Keep it handy to ensure your lips stay happy and moisturized.
Conclusion on How to Make Lip Moisturizer
Making your own lip moisturizer is not only a fun little DIY project, but it also gives you control over what you put on your lips. You’ll feel fabulous knowing that you’ve crafted a product that nourishes and protects your delicate pout. After trying out how to make lip moisturizer, don’t forget to share your creations with friends and spread the joy of this delightful beauty ritual!
For more tips on natural beauty, check out Healthline or learn about homemade skincare at MindBodyGreen. Happy crafting and pouting! 🌟