Making your own beeswax lip balm is not only a delightful craft, but it’s also a super fun way to pamper yourself with all-natural ingredients! DIY beauty products have exploded in popularity, and for a good reason. When you whip up your own concoction, you get to choose the flavors, scents, and feel-good ingredients that suit your personality and lip needs. Plus, how cool is it to show off your homemade lip balm to friends? Spoiler alert: they’ll be asking for your secrets in no time!
Understanding the Benefits of Beeswax in Lip Balm
Beeswax is a fabulous ingredient for lip balm, and it’s no wonder many people want to learn how to make beeswax lip balm. Let’s take a closer look at some of the amazing benefits:
Protective Barrier
Beeswax creates a protective layer on your lips, keeping moisture locked in and preventing the elements from drying them out. It literally acts as your lip’s shield against harsh weather, whether it’s biting cold or scorching sun.
Anti-inflammatory Properties
This marvelous wax is packed with anti-inflammatory properties, which can help soothe irritated lips. So, if you’re suffering from chapped lips (who isn’t at some point?), this is the magic ingredient you need in your life!
Natural and Eco-Friendly
How to make beeswax lip balm means you’re using an ingredient that’s both natural and eco-friendly. Unlike commercial lip balms that can contain unnecessary chemicals and synthetic fragrances, your own lip balm will be free from nasties, which is always a win-win!
Gathering Ingredients for Beeswax Lip Balm
Now that we know why beeswax is such a superstar, it’s time to gather our supplies! Here’s a simple list of all the ingredients you’ll need to whip up your own fabulous lip balm.
Essential Ingredients:
- Beeswax Pellets: About 1 oz (for that gorgeous, solid consistency).
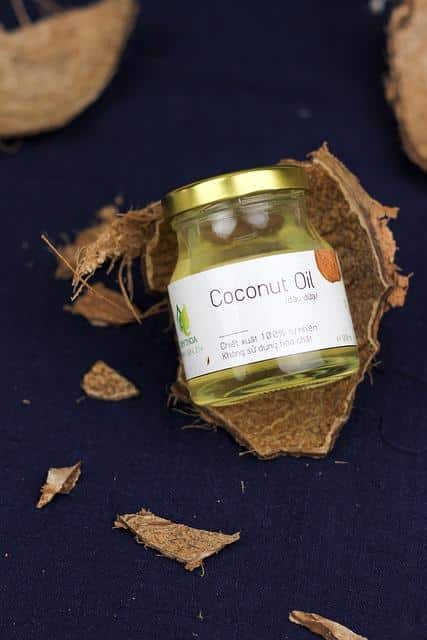
- Carrier Oil: 1 oz (sweet almond oil, jojoba oil, or coconut oil work brilliantly).
- Shea Butter or Cocoa Butter: 1 oz (for creaminess, yum!).
- Essential Oils: 5-10 drops (your choice for fragrance – peppermint, lavender, or vanilla are all fabulous!).
- Honey: Optional (a touch for sweetness and extra nourishment).
Feel free to play with the proportions a bit according to your preference.
Tools Required:
- Double boiler or microwave-safe bowl
- Measuring spoons or a kitchen scale
- Stirring stick or spoon
- Lip balm containers (cute little tins or tubes work beautifully)
The Step-by-Step Process to Make Beeswax Lip Balm
Now comes the exciting part—making your very own lip balm! Let’s dive into the step-by-step guide to how to make beeswax lip balm.
Step 1: Melting the Ingredients
In a double boiler, or a microwave-safe bowl, combine the beeswax, carrier oil, and shea or cocoa butter. If you’re using the microwave, melt in short increments (15 seconds at a time) to avoid overheating.
- Tip: Stir often! A gentle breeze from your spoon helps mix everything nicely, creating a smooth base for your balm.
Step 2: Adding Scents and Extras
Once everything is melted and removed from heat, it’s time to add the fun stuff—the essential oils! If you’re going the honey route for a kiss of sweetness, now’s when you stir that in too. Remember to mix well until everything is incorporated.
Step 3: Pouring into Containers
Carefully pour the mixture into your lip balm containers. It can get a tad messy, so don’t forget to have some paper towels nearby for any drips (whoops!). Allow them to cool and set for about 30-60 minutes at room temperature.
Step 4: Enjoy Your Creation!
Once your lip balm has fully cooled and solidified, it’s time for the best part—applying it! You can personalize your little pots by labeling them with cute names or decorating them if you’re feeling crafty.
Tips for Customizing Your Beeswax Lip Balm
Being the creative soul you are, why not mix it up? How to make beeswax lip balm can be tailored in so many ways! Here are some fun ideas:
- Color: Want tinted lips? Add a tiny amount of natural mineral pigments or beetroot powder for a pop of color.
- Scent Blends: Mix different essential oils for unique combinations. Think: citrus and mint for a refreshing zing, or vanilla and lavender for a calming vibe.
- Nutritional Add-Ins: Consider incorporating vitamin E oil or a touch of calendula oil for extra nourishing benefits.
Storing Your Lip Balm
Your homemade beeswax lip balm will last up to a year if stored correctly. Keep them in a cool, dry place away from direct sunlight. If they begin to melt—uh-oh—just pop them in the fridge for a bit.
Benefits of Using Your Own Lip Balm Versus Store-Bought Options
Homemade goodness rules! Here’s a sweet little comparison:
| Aspect | Homemade Beeswax Lip Balm | Store-Bought Lip Balm |
|---|---|---|
| Ingredients | All-natural, customizable | Often contains synthetic additives |
| Cost | Inexpensive to make | Can be pricey |
| Personal Touch | Unique to preferences | Same formula for everyone |
Conclusion on How to Make Beeswax Lip Balm
Incorporating beeswax into your beauty routine is a delightful way to stay pampered and chic! Learning how to make beeswax lip balm is not just about creating a fabulous product; it’s about embracing the crafty side of yourself, having fun, and showing some love to your lips!
Ready to make your own? Gather those ingredients and get started on this exciting DIY project. And remember, the world of homemade lip balms is as vast as your imagination. Happy crafting! For more inspiration on DIY beauty, check out this article.
Part of the fun is sharing your creations with others—after all, everyone deserves a little taste of your fabulous lip care magic! 🌟