How to make a hair mask? It sounds like an adventure, doesn’t it? Hair masks are the ultimate treat for your locks, giving them that much-needed love and care they absolutely crave. From nourishing dry strands to revitalizing dull hair, a homemade hair mask can be a game-changer in your hair care routine. So, let’s dive into the fabulous world of DIY hair masks, shall we?
Understanding Hair Masks
Hair masks are concentrated treatments designed to penetrate the hair shaft and deliver an intense boost of moisture, nutrients, and overall nourishment. They can transform your tresses from limp and lifeless to shiny and voluminous. The best part? You can customize your hair mask at home using natural ingredients that suit your hair type and needs.
Benefits of Using Hair Masks:
- Deep Conditioning: Unlike regular conditioners, hair masks are more potent and can provide deep conditioning to your strands, leaving them soft and manageable.
- Enhanced Shine: A hair mask is a fabulous way to pump up the shine in your hair, giving it that salon-fresh look.
- Repair Damage: Whether you’re dealing with heat damage, chemical treatments, or environmental stressors, a good hair mask can help repair and restore your hair’s health.
- Moisture Retention: For those with curly or dry hair, a hair mask can work wonders in sealing in moisture, preventing frizz, and enhancing texture.
- Manageability: Say goodbye to tangles and hello to easy styling! The right hair mask can make your hair much more manageable.
How to Make a Hair Mask
Creating a hair mask at home is as easy as pie! Below, we’ve compiled some delightful recipes that are perfect for different hair types. Let’s swirl our kitchen magic and make our hair (and hearts) happy!
DIY Coconut Oil Hair Mask for Dry Hair
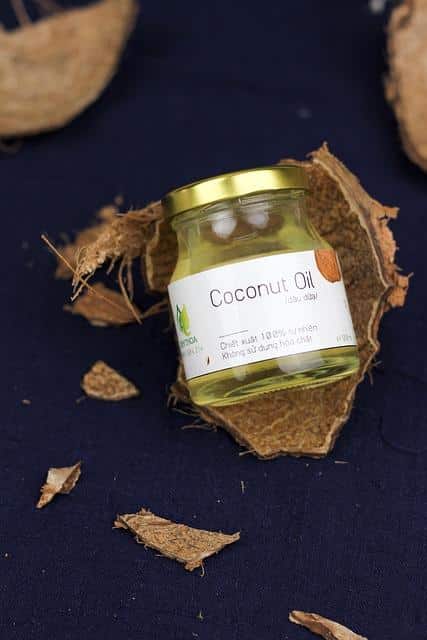
Coconut oil, oh la la! This tropical elixir is super nourishing and packed with fatty acids that work wonders on dry hair.
Ingredients:
- 2 tablespoons of coconut oil
- 1 tablespoon of honey
- 1 tablespoon of yogurt
Instructions:
- In a bowl, mix the coconut oil, honey, and yogurt until you achieve a creamy consistency.
- Apply the mask evenly from roots to tips, ensuring that each strand is coated.
- To amp up the moisture, put on a shower cap or wrap your hair in a warm towel.
- Leave the mask on for 30-45 minutes, then rinse it out with your regular shampoo and conditioner.
Avocado and Olive Oil Hair Mask for Damaged Hair
Avocado is rich in vitamins and healthy fats, making it a superstar for repairing damaged hair.
Ingredients:
- 1 ripe avocado
- 2 tablespoons of olive oil
- 1 tablespoon of apple cider vinegar
Instructions:
- Mash the avocado in a bowl until it’s smooth and creamy.
- Add the olive oil and apple cider vinegar, and mix well.
- Section your hair and apply the mask liberally, focusing on the ends.
- Leave the mask on for about an hour, then wash it out thoroughly.
Honey and Banana Hair Mask for Curly Hair
Bananas are not just for smoothies! They can help define curls and add moisture to your locks.
Ingredients:
- 1 ripe banana
- 2 tablespoons of honey
- 1 tablespoon of coconut milk
Instructions:
- In a blender or bowl, puree the banana until very smooth, avoiding any lumps.
- Add the honey and coconut milk, mixing until fully incorporated.
- Apply the mask to your hair, focusing on the mid-lengths and ends.
- Leave on for 30 minutes, then rinse it out with cool water.
How to Use a Hair Mask Effectively
Simply making a hair mask isn’t enough. Using it the right way can amplify its benefits. Here are our tips for the best results:
- Choose the Right Mask: Tailor your DIY hair mask to your specific hair concerns. Know your hair type—whether it’s oily, dry, colored, or curly—to select the best recipe for you.
- Preparation is Key: Always start with clean, damp hair. This helps the mask to penetrate better and ensures optimal absorption of nutrients.
- Be Generous: Don’t skimp on product! Apply a generous amount of the mask, ensuring that every strand is covered.
- Heat Things Up: For deep conditioning benefits, apply heat. Wrap your hair in a warm towel or use a heat cap to help the mask absorb better.
- Set a Timer: Resist the urge to leave the mask on indefinitely. Following the recommended time enhances effectiveness without causing unwanted buildup.
- Rinse Thoroughly: After the treatment, make sure to rinse your hair thoroughly with lukewarm water, followed by shampoo and conditioner as usual.
Frequency of Use
How often should you indulge in this heavenly hair mask bliss? It largely depends on your hair needs:
- For Dry or Damaged Hair: 1-2 times a week.
- For Normal Hair: Once a week should do the trick!
- For Oily Hair: Every 2-3 weeks to prevent excess oil buildup.
Finding the right frequency is a matter of trial and error, so feel free to adjust according to how your hair feels.
Storing Hair Masks
If you loved your hair mask so much that you made extra, here’s how to store it!
| Hair Mask Type | Storage Tips |
|————————|————————–|
| Oil-Based Masks | Store in an airtight jar, keep in a cool, dark place for up to 1 month. |
| Fruit-Based Masks | Use fresh! If storing, keep in the fridge for no more than 3 days. |
| Yogurt-Based Masks | Refrigerate and use within 5 days for best results. |
Make sure to label your jars (because, honestly, who can remember what’s in there?!), and keep track of your DIY creations.
Conclusion
So, the overarching question remains: How to make a hair mask? With endless possibilities, creating delightful hair masks at home allows you to pamper your hair naturally and effectively. With just a few simple ingredients from your kitchen and a little sprinkle of love, you can whip up a hair mask that leaves your locks looking luscious and feeling fabulous.
Ready, set, DIY! Treat your hair to some well-deserved TLC and get ready to flaunt your fabulous locks. Happy masking!
To read more about hair care tips, visit Healthline and WebMD.