
Creating a bruise using makeup can be both a fun and creative experience! Whether you’re preparing for a themed party, Halloween, or simply feel like embracing your inner artist, mastering the art of makeup bruising can add flair to your creativity. Let’s dive into How To Make A Bruise Using Makeup? and explore some incredible techniques, tips, and product recommendations to achieve that perfect faux injury look.
Understanding the Basics of Bruise Makeup
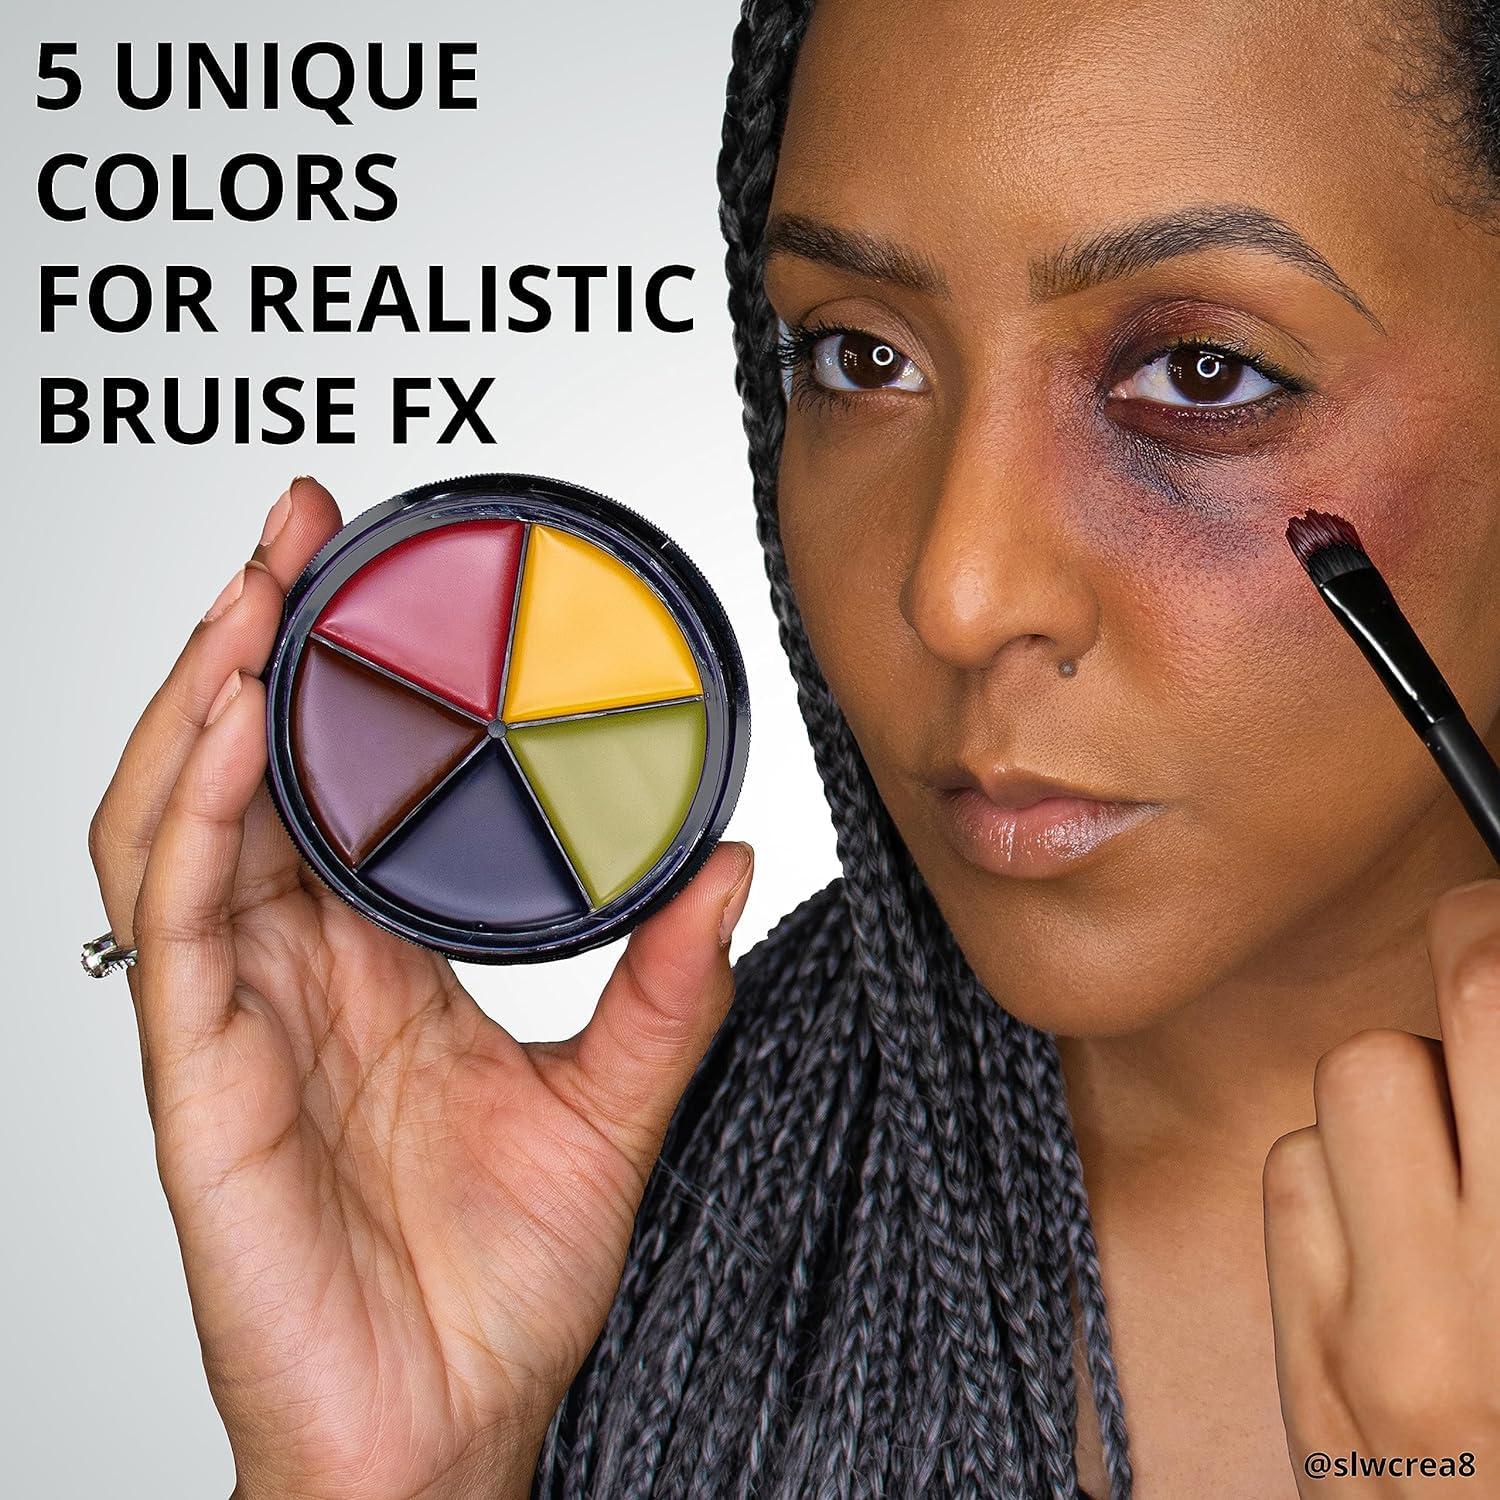
When it comes to How To Make A Bruise Using Makeup?, understanding how real bruises develop is the key to replicating them accurately. Bruises generally appear in various stages of color, starting with red, then darkening to purple, and finally fading to yellow and green. This transition mimics the blood pooling under the skin and gradually dispersing.
The Color Palette for Bruise Makeup
Creating a realistic bruise involves using a variety of colors. Here’s a quick guide to help you choose the right shades:
| Color | Stage of Bruise | Usage Tip |
|---|---|---|
| Red | Fresh Bruise | Apply around the impact point as a base. |
| Purple | 1-3 Days Old | Layer over red for depth. |
| Blue | Current Stage | Add to the edges for realism. |
| Green | 4-5 Days Old | Use sparingly for faded bruises. |
| Yellow | Healing | Blend around the edges for a natural look. |
Gathering Your Makeup Supplies
Before you start with How To Make A Bruise Using Makeup?, make sure you have the right tools and products. Here’s a list of essential supplies:
- Cream or Liquid Foundation: A base that matches your skin tone.
- Color Palette: A variety of face paints, preferably in red, purple, blue, green, and yellow.
- Makeup Brushes: Different sizes are useful for various techniques.
- Sponges: Great for blending colors seamlessly.
- Setting Spray: Keeps your masterpiece from smudging.
- Tissue or Paper Towels: Useful for cleaning brushes or correcting mistakes.
The Art of Application
Now that your supplies are ready, it’s time to delve into the process of How To Make A Bruise Using Makeup?. Here’s a step-by-step guide for the perfect bruise effect.
Step 1: Prepare Your Skin
Start with a clean, moisturized face. This step is crucial because it helps the makeup adhere better. Apply a thin layer of foundation to create an even canvas. This step prevents the bruise colors from looking too stark against your natural skin tone.
Step 2: Create the Impact Point
Using a red cream or liquid product, apply it to the area where you want the bruise. This represents the initial trauma and should be the focal point of your makeup. Use small dabbing motions with your finger or sponge to achieve a natural look.
Step 3: Add Depth with Purple and Blue
Layer purple around the edges of the red area. This will create that deep, contused effect that bruises have. Afterward, take a blue shade and apply it sparingly around the purple. This adds depth and dimension, mimicking the deeper blood discoloration associated with a real bruise.
Step 4: Blend and Feather the Edges
Get your blending game on! Use a clean sponge or brush to gently blend the edges of your colors. You want a seamless transition from the rich purple and blue to your natural skin tone. Avoid harsh lines, as bruises are generally diffuse.
Step 5: Lighten with Green and Yellow
To represent the healing phase, you can add a little bit of green and yellow around the edges. Instead of covering the whole area, lightly dab these colors to suggest that the bruise is fading. Remember, subtlety is key!
Step 6: Set Your Masterpiece
Once you’re satisfied with your faux bruise, use a good setting spray. This step ensures that your creative endeavor stays intact throughout your day (or party). Just hold the spray at arm’s length and mist over your creation.
Common Mistakes and How to Avoid Them
Now that you know How To Make A Bruise Using Makeup?, here are some common pitfalls and how to dodge them like a pro:
- Using Too Many Colors: Stick with a minimum of three or four colors for a more realistic look.
- Harsh Lines: Always blend! Bruises do not have sharp borders.
- Overdoing the Bright Colors: Real bruises are often muted. Keep it natural.
- Wrong Placement: Research realistic bruise locations on the body for authenticity.
Conclusion on Makeup Bruising Technique
Creating a bruise using makeup can unleash your creative side while impressing friends with your artistic flair! With the right technique and colors, you can achieve realistic effects for all sorts of occasions. Remember to have fun experimenting while ensuring you feel fabulous, even when looking a little banged up! So next time you’re curious about How To Make A Bruise Using Makeup?, you’ll have everything you need in your beauty toolkit to create an imaginative and creative masterpiece without a scratch! Don’t forget to practice; after all, mastering your craft takes time.
For more in-depth makeup techniques, check out this guide and let your creativity shine! Happy bruising!


