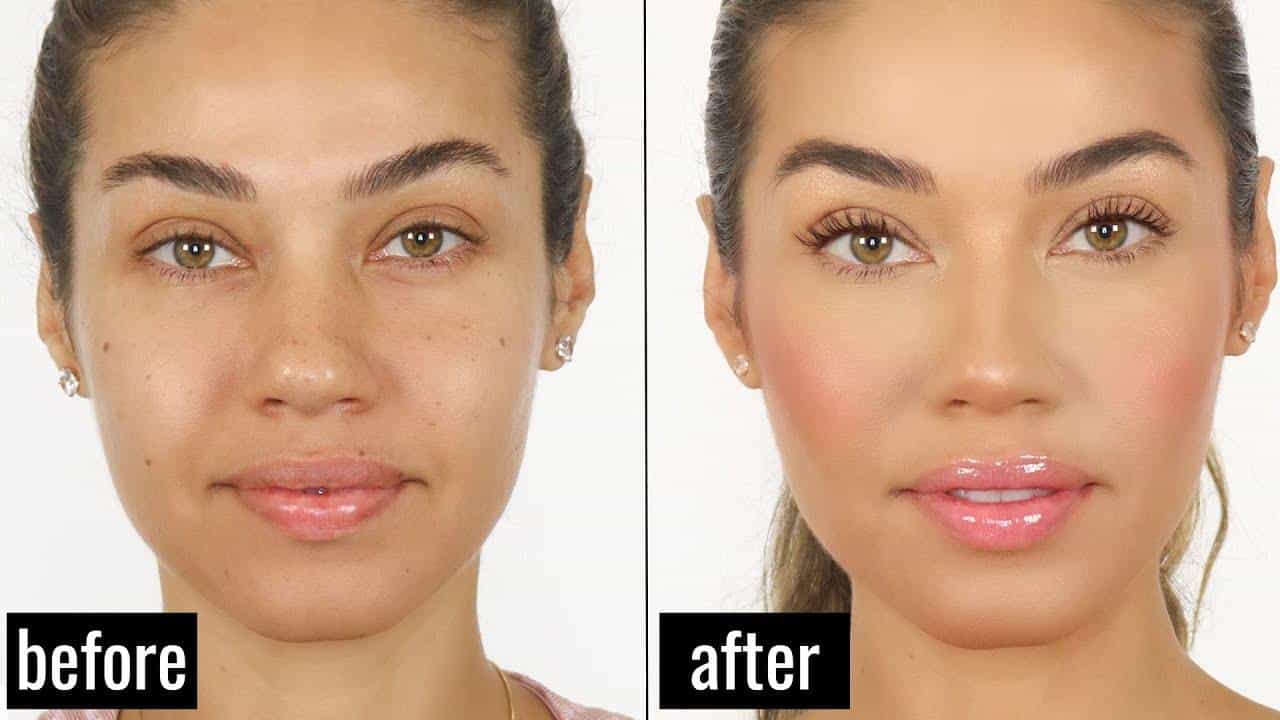
Are you ready to dive into the fabulous world of makeup? Learning how to do beginner makeup can feel a bit daunting, but let’s keep it super fun and lighthearted while we explore this magical journey together! Whether you’re gearing up for a special occasion or just looking to add a little sparkle to your everyday routine, mastering the art of makeup can be a blast. In this guide, we’ll break it all down step by step, making it easier than choosing the perfect glitter lip gloss!
Understanding Your Skin Type
Before we dive into the makeup application process, it’s important to start with your canvas—your skin! Determining your skin type will help you select the right products and ensure your makeup looks fabulous all day long. Your skin can be categorized into four main types:
1. Normal Skin
- Balanced with few imperfections.
- Generally not too oily or dry.
2. Oily Skin
- Produces excess oil, leading to shine throughout the day.
- Prone to acne and enlarged pores.
3. Dry Skin
- Lacks moisture and can feel tight or flaky.
- May show signs of irritation or rough patches.
4. Combination Skin
- A mix of oily and dry areas.
- Typically oily in the T-zone (forehead, nose, chin) and dry on the cheeks.
Recognizing your skin type not only makes it easier to choose products for how to do beginner makeup, but it can also save you from potential mishaps, like a foundation that makes your dry skin look like the Sahara Desert!
Assembling Your Makeup Kit
Let’s talk about the essential products you’ll need to create a stunning look. Your makeup kit doesn’t have to be massive, just a few key items will get you started. Here’s a handy-dandy list of what you’ll need:
Essential Makeup Products
- Foundation: Choose a formula that suits your skin type (liquid, powder, or cream).
- Concealer: Perfect for hiding those pesky blemishes or dark circles.
- Blush: Adds a pop of color to your cheeks.
- Eyeshadow: Pick neutral shades for a natural look and a few fun colors for more flair!
- Eyeliner: Liquid or pencil, it’s up to your style!
- Mascara: Let’s lengthen those lashes!
- Lipstick or Gloss: Go for your favorite shades to complete your look.
Optional but Fun Add-Ons
- Highlighter: For a little glow and radiance.
- Bronzer: Adds warmth and definition to your face.
- Setting Spray: Keep that makeup locked in all day long!
Basic Makeup Kit Table
| Product | Purpose |
| Foundation | Even out skin tone |
| Concealer | Hide blemishes and dark circles |
| Blush | Add color to cheeks |
| Eyeshadow | Create depth and interest on eyelids |
| Eyeliner | Define the eyes |
| Mascara | Enhance lashes |
| Lipstick/Gloss | Add color and shine to lips |
Preparing Your Skin
The secret to a flawless makeup application lies in how you prepare your skin. Here’s the spicy scoop on how to get that canvas ready before diving into how to do beginner makeup!
- Cleanse: Start with a fresh face! Use a gentle cleanser to remove any dirt and oil.
- Exfoliate: Exfoliating 1-2 times a week keeps your skin smooth. Just don’t overdo it!
- Moisturize: Apply a moisturizer that suits your skin type. For oily skin, go for a lightweight gel, and for dry skin, a creamy hydrating moisturizer is your bestie.
- Prime: Using a makeup primer can help your makeup go on smoothly and last longer. It’s like a magic potion for your face!
Applying Foundation
Now that you’ve got a clean slate, let’s talk about the star of the show—foundation! Choosing the right shade is crucial for that ‘I woke up like this’ glow. Here’s how to apply your foundation like a pro:
Steps for Foundation Application
- Choose Your Formula: If you’re new to makeup, a liquid foundation offers great coverage without feeling too heavy.
- Find Your Shade: Test the foundation on your jawline. It should blend seamlessly with your neck.
- Application Tools: Use your fingers, a makeup sponge, or a foundation brush. Each method gives a different finish, so you can experiment to find your fave.
- Fingers: For a natural finish.
– Sponge: For a soft, airbrushed look.
– Brush: For full coverage.
- Blend, Blend, Blend: Start from the center of your face, blend outward for even coverage. Remember, beauty is about blending, darling!
Foundation Tips
- Build Up Coverage: If you want more coverage, add a little more foundation rather than caking it on.
- Check in Natural Light: Always check how your foundation looks in natural light—no one wants a surprise when they step outside!
Mastering Concealer
If foundation is your best friend, then a good concealer is definitely your BFF (Best Friend Forever)! Concealer helps hide blemishes, redness, and dark circles, making you look fresh and bright.
How to Apply Concealer
- Choose the Right Shade: Pick a shade that matches your foundation for blemishes, and one that is one or two shades lighter for under your eyes.
- Use the Right Tools: You can use your fingers, a small brush, or a sponge.
- Dot and Blend: Apply a few dots on the areas you want to conceal and gently blend. Avoid rubbing too hard, or you’ll remove your foundation!
Concealer Tips
- For Dark Circles: Apply in a triangle shape under the eyes for an instant lifting effect.
- For Blemishes: Avoid applying too much. Less is more, darling!
Bringing Life with Blush and Highlighter
Alright, lovelies, let’s bring some color to those cheeks! Blush not only makes you look more youthful but also adds a fresh, radiant touch to your look.
Applying Blush
- Choose Your Shade: For a natural look, go for soft pinks or peaches.
- Placement: Smile and apply blush to the apples of your cheeks, blending upwards towards your temples.
- Build Slowly: Start with a little product and build it up until you reach your desired color.
Adding Glow with Highlighter
- Choose Your Type: Whether it’s powder, cream, or liquid, highlighters are all about the glow!
- Placement: Apply highlighter on the high points of your face—cheekbones, brow bones, and the bridge of the nose.
Defining Your Eyes with Eye Makeup
Now let’s shift our attention to those gorgeous peepers! The eyes are often considered the windows to your soul, so let’s make sure they shine! Here’s how to take your eye makeup skills from beginner to stunning.
Steps for Eyeshadow Application
- Choose Your Palette: Stick to neutral shades for everyday wear or explore vibrant colors for a more daring look.
- Base Shadow: Apply a light base shadow over your entire lid to create a blank canvas.
- Crease Color: Add a medium shade in the crease to add depth. Use a fluffy brush to blend it out.
- Accent Shade: Add a darker shade on the outer corner and blend well.
- Highlight: Apply a shimmery shade on the brow bone and inner corner for a pop!
Mastering Eyeliner and Mascara
- Eyeliner: Start by applying eyeliner along your lash line. A pencil is ideal for beginners—it’s easy to control!
- Mascara: Curl your lashes for added drama and apply mascara from the roots to the tips for volume. Wiggle the wand as you go for added lift!
Eye Makeup Tips
- Less Is More: Start with a small amount of product and build up as desired.
- Practice Makes Perfect: Don’t stress if it doesn’t turn out perfect right away! Just keep practicing and you’ll get the hang of it.
Finishing Touch with Lips
let’s wrap up this glam training session with our lips! A little color on the lips can turn your look from drab to fab in an instant.
Steps for Lip Makeup
- Choose the Right Lip Color: Pick both a lipstick and a gloss for a versatile look.
- Application: Start from the center of your lips, blending outward. Don’t be afraid to go bold, darling!
- Lip Liner: For a polished
Look, consider using lip liner to define your lips before applying lipstick. This can help prevent any feathering and increase the longevity of your lip color.
Lip Makeup Tips
- Blot! After applying your lipstick, blot with a tissue to remove excess product and help your color set.
- Gloss it Up! If you want a shiny finish, follow with a gloss or a high-shine lipstick.
Setting Your Makeup
Now that you’ve created a beautiful look, it’s time to ensure it lasts all day! Setting your makeup is crucial, especially if you’re heading out for a long day or special occasion.
Setting Your Makeup in Place
- Setting Powder: Lightly dust some translucent setting powder over your face to lock everything in place, focusing on areas that tend to get oily.
- Setting Spray: Finish off with a setting spray. Hold it about 8-12 inches away from your face and spritz to give your makeup a natural, dewy finish while ensuring longevity.
Tips for a Gorgeous Makeup Finish
- Stay Hydrated: Drinking plenty of water keeps your skin looking fresh and radiant.
- Regular Cleanup: Clean your brushes and tools regularly to avoid bacteria buildup that can cause breakouts.
- Remove Makeup Properly: Always remove your makeup before going to bed to keep your skin healthy and clear.
Practice Makes Perfect!
Remember, practice is key! Don’t hesitate to experiment with different colors and techniques. Makeup is all about having fun and expressing yourself, so embrace your creativity! With time, patience, and practice, you’ll develop your unique style and effortlessly nail your makeup looks like a pro.
So, are you ready to step into your makeup adventure? Grab your brushes, let your imagination run wild, and don’t forget to smile—you’re going to look fabulous! 🌟