Cleaning makeup brushes might not be the sparkliest of tasks, but it’s oh-so-necessary for every makeup lover out there! Over time, those darling little brushes can harbor all sorts of unwanted guests, like bacteria and leftover product, which can lead to breakouts and skin woes. This is why knowing how to clean up your makeup brushes is every beauty enthusiast’s best-kept secret. Ready to dive into the world of squeaky-clean brushes? Let’s get started!
The Importance of Cleaning Makeup Brushes
Keeping your makeup brushes clean not only extends their lifespan but also helps maintain your skin’s health and the vibrancy of your makeup. When you apply products with dirty brushes, you’re transferring oils, dead skin cells, and bacteria onto your face. Uh-oh! Regular cleaning can prevent skin irritations and pesky breakouts. Knowing how to clean up your makeup brushes isn’t just a matter of aesthetics; it’s a crucial part of your beauty routine!
How Often Should You Clean Your Makeup Brushes?
The frequency of cleaning your brushes can depend on how often you use them and the types of products you apply. Here’s a simple guideline to follow:
- Daily Use for Liquid Products: If you’re using liquid foundations or cream-based products, consider cleaning your brushes after every use. It’s a bit of a hassle, but your skin will thank you.
- Powder Brushes: For brushes used with powdered products, a weekly wash should suffice to keep things fresh.
- Special Occasion Brushes: If you’re prepping for a night out or special event, give your brushes a little cleanse beforehand for optimal application.
How To Clean Up Your Makeup Brushes: Step-by-Step Guide
Now let’s roll up those sleeves and grab your favorite cleaning supplies! Here’s a simple step-by-step guide on how to clean up your makeup brushes effectively.
Gather Your Supplies
Before diving into the cleaning session, collect everything you’ll need:
- Gentle soap or brush cleaner (like baby shampoo or a specialized brush cleaner)
- Clean cloth or paper towels
- A small bowl or dish
- Lukewarm water
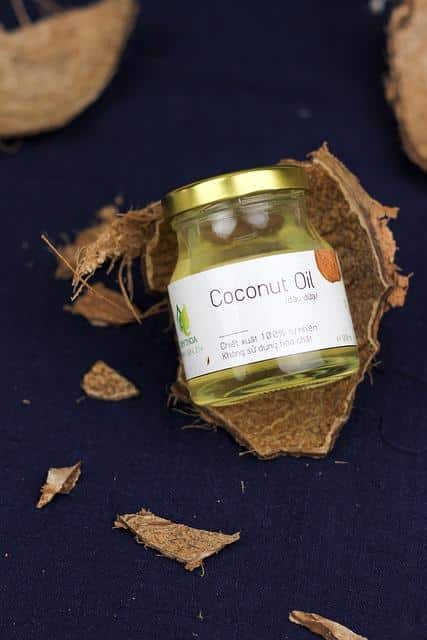
- Optional: Olive oil (for oil-based makeup)
Step 1: Rinse and Soak
- Rinse the Brush: Begin by rinsing the bristles of your brush under lukewarm water. Be sure to keep the water flowing from the base of the bristles downward to prevent water from seeping into the ferrule, which can loosen the glue.
- Soak the Brush: If your brushes are particularly grubby, you might want to soak them in a solution of warm water and a splash of gentle soap. Let them soak for a few minutes to loosen up all that gunk!
Step 2: Lather and Clean
- Apply a small amount of your chosen soap into the palm of your hand or a clean dish.
- Swirl the brush bristles in the soap, creating a lather. Use gentle, circular motions to work the soap through the bristles.
Step 3: Rinse Thoroughly
Once you see that lovely lather has been created, rinse the brushes again under lukewarm water. Keep rinsing until the water runs clear, ensuring all soap and makeup residues are completely removed.
Step 4: Shape and Dry
- Reshape Bristles: Gently reshape the bristles to their original form. This step helps maintain their shape, which is essential for effective application in the future.
- Lay Flat to Dry: Place the brushes flat on a clean towel. Never store them upright in a cup while wet, as the water can cause damage to the handle and ferrule.
Best Practices for Maintenance
- Avoid Hot Water: Hot water can damage and warp your brushes, so stick with lukewarm water.
- Don’t Skip the Conditioning: If you’re using a scrub or soap, follow up with a couple of drops of olive oil for conditioning, especially for natural hair brushes.
Additional Tips for Keeping Brushes Clean
- Use a spray brush cleaner for quick daily cleans if you’re short on time. Simply spritz and wipe on a tissue.
- Invest in a silicone brush cleaning mat. These can significantly simplify the scrubbing process, making it oh-so-easy to rinse and clean.
- For very stubborn makeup, like glitter or waterproof formulas, consider using a dual-phase cleansing oil.
DIY Cleaning Solutions
If you’re a fan of DIY and want to get crafty, consider whipping up your own cleaning solution at home! Here’s a super simple recipe:
DIY Brush Cleaner Recipe:
| Ingredients | Amount |
|---|---|
| Distilled Water | ½ cup |
| Baby Shampoo | 1 tablespoon |
| White Vinegar | 1 tablespoon |
Just mix the ingredients in a small bowl, dip your brush, and follow the same cleaning steps we discussed earlier!
Signs Your Brushes Need a Good Clean
Now that you know how to clean up your makeup brushes, let’s talk about some signs that your brushes desperately need a makeover:
- Dull Application: If your brushes aren’t working effectively or your makeup seems patchy, it’s time for a cleanse!
- Visible Grime: If you can physically see makeup buildup on the bristles, that’s a sure sign your brushes are due for a bath.
- Scent: Any odd or funky odors are indicators that your brushes are housing unwanted bacteria.
Essential Tools for Optimal Brush Care
While cleaning your brushes might require little more than soap and water, there are nifty tools that can make the process even easier and more efficient:
- Brush Cleaning Pad: These silicone mats have raised textures that help scrub away makeup while preserving the shape of bristles.
- Reuseable Microfiber Cloths: They’re perfect for quickly wiping off makeup from brushes after a single-use.
Final Thoughts on How To Clean Up Your Makeup Brushes
In a nutshell, keeping your brushes clean can work wonders for your skin and makeup application’s longevity. By regularly cleaning your brushes, you’re not just maintaining your beauty tools—you’re also investing in your overall skincare routine. Remember, knowing how to clean up your makeup brushes shouldn’t be a dreaded chore; it’s a fabulous way to pamper your brushes and keep your skin glowing! Make it a fun, self-care routine, and soon those brushes will feel as fresh as a daisy! ✨
Cleaning your brushes can also be a lovely time to light a scented candle, put on your favorite playlist, and just enjoy the moment. Happy cleaning, beauties!