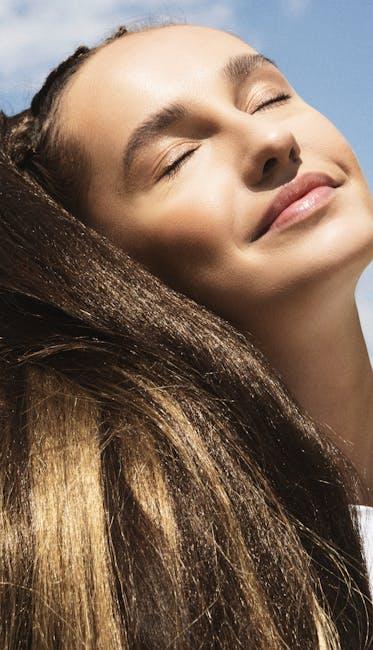
How To Apply Makeup In Adobe Photoshop? If you’ve ever wondered how to transform a simple photo into a glamorous masterpiece, you’re in the right place. Makeup in real life can be a tricky business, but applying makeup in Adobe Photoshop is like playing with a digital beauty kit! Whether you’re retouching a portrait, preparing images for social media, or just having fun with your pictures, knowing how to achieve that flawless look in Photoshop can be an absolute game-changer. In this guide, we’ll dive deep into the world of digital makeup application in Photoshop, filled with tips, tricks, and delightful techniques to help you shine!
Understanding the Interface of Adobe Photoshop
Before we dive into the makeup magic, it’s essential to embrace the Photoshop interface. Understanding where everything is will make your makeup application feel like a walk in the park! So grab your favorite coffee, and let’s break down this fabulous tool.
Familiarizing Yourself with Tools
Photoshop is packed with tools that can help enhance your photos, and you’ll want to particularly focus on the following:
- Brush Tool: Perfect for applying makeup effects like blush or eyeshadow.
- Clone Stamp Tool: Great for touch-ups and creating flawless skin.
- Dodge and Burn Tools: Ideal for highlighting and contouring.
- Layer Masks: Allow for non-destructive editing so you can experiment without fear.
Each tool serves its purpose, and the magic starts when you combine them in creative ways!
Navigating Menus and Panels
Don’t let the myriad of options overwhelm you! Familiarize yourself with the panels that you will use frequently, such as:
- Layers Panel: This is your best friend. You’ll want to create new layers for every makeup stroke.
- Color Palette: Choose your perfect shades and tones here; you can get those blush colors to pop!
- History Panel: A lifesaver for undoing those “oops” moments!
With these tools and panels under your belt, you are all set to dive into the enchanting world of makeup!
Steps to Apply Makeup in Adobe Photoshop
Applying makeup in Photoshop might sound intimidating, but fear not, my fabulous friend! Here’s a step-by-step breakdown of how to easily elevate your photo game with stunning makeup effects.
Prep Your Image for a Flawless Finish
Before you start adding the glitz and glam, creating a strong foundation for your image is key.
- Open Your Image: Load your picture in Photoshop. Choose a high-resolution image for the best results.
- Duplicate Your Background Layer: Right-click on the background layer and select ‘Duplicate Layer’ to work non-destructively.
- Use the Healing Brush Tool: Smooth out any skin imperfections first for that dreamy base. Lightly click or drag over blemishes and scars; this tool will blend beautifully.
Adding Foundation and Contour
Now comes the fun part! Let’s bring some dimension and smoothness to the skin.
- Create a New Layer: Always start a new layer for makeup. This way, you can experiment without ruining what’s underneath.
- Select the Brush Tool: Choose a soft brush with a low opacity (around 10-20%).
- Choose a Foundation Color: Pick a color that matches the skin tone of your subject. The Color Picker will be your best pal here.
- Apply Foundation Effect: Lightly brush over areas of the skin where you want a uniform look. Use swipes, not heavy strokes!
- Mimic Contouring: Select a slightly darker shade for contouring. Apply it under cheekbones, along the jawline, and on the sides of the nose.
Creating Eye Makeup Magic
Eyes are the windows to the soul, and they deserve the extra sparkle!
- Eyeshadow Layer: Create another new layer dedicated to eyeshadow. Choose colors that complement your subject’s eye color.
- Select the Brush Tool Again: Use a slightly larger brush for the eyelids. Blend from the lash line upwards for a more natural look.
- Add Eyeliner: Utilize the Brush Tool again with a fine, hard brush to give the illusion of eyeliner. Eyeliner can be creative and bold!
- Finish with Mascara: To add lashes, use a hard brush to flick upwards from the lash line, mimicking mascara strokes.
Finishing Touches with Lip Color
Kissable lips coming right up! This step is essential for that final glam look.
- Create a New Layer for Lips: Just like with eyeshadow and foundation, create a separate layer.
- Select a Lip Color: Choose from reds, pinks, or nudes. Go wild with color!
- Brush Tool Magic: Use a soft brush to outline the lips, and then fill them in lightly for that luscious finish.
- Add Shine: Finish it off with a light application of a lighter shade or white centered on the lips for a glossy effect.
Advancing Your Makeup Skills in Photoshop
Now that you have mastered the basics of how to apply makeup in Adobe Photoshop, let’s explore some advanced techniques to take your digital makeup artistry to another level!
Using Blending Options for Realistic Effects
Transforming simplistic strokes into a glamorous reality is all about blending!
- Layer Styles: Right-click on the layer and explore blending options. Adjust opacity and blend modes to create realistic textures.
- Smudge Tool: Lightly use the smudge tool on edges to make the makeup look soft and seamlessly blended into the skin.
Adding Accessories and Digital Glam
Want to Jazz things up? Add some sparkle with accessories!
- Create a New Layer for Accessories: Let’s say you want to add digital eyelashes or other accessories, always start on a new layer.
- Design with the Pen Tool: For more detailed items, use the Pen Tool to trace shapes and fill them with color.
- Play with Filters: Use the Filter menu for special effects, like a soft glow or light flares, which can enhance the overall appeal.
Save for Future Inspiration
Do you want the world to admire your stunning work? Here’s how to save your masterpiece:
- Save as PSD: Always save your project as a Photoshop file (.PSD) to keep all your layers intact.
- Export for Sharing: When you’re ready to share your work, export it as a .JPEG or .PNG for the best quality!
Best Practices for Digital Makeup Application
Having a strategy can really set your photos apart! Here are some best practices to keep in mind.
Keep It Light and Fun
- Less is More: Just like physical makeup, sometimes too much can overwhelm your photo. Swipe lightly and build gradually.
- Experiment: If you’re feeling adventurous, don’t be afraid to try bold styles that you wouldn’t wear in real life; you are the artist!
Use Reference Images
Draw inspiration from others! Look at professional makeup styles and mimic elements in your digital creations.
Regular Practice
Just like perfecting a new makeup technique, the more you play with Photoshop, the better you’ll get. So practice, practice, practice, darling!
Conclusion
learning how to apply makeup in Adobe Photoshop is not only fun but opens up a world of creativity that can elevate any photograph. With the right tools, techniques, and a sprinkle of creativity, you can create stunning digital makeup looks that are sure to impress and inspire. So grab your virtual brushes, practice these steps, and watch your editing skills blossom! Remember, beauty is in the eyes of the beholder, and with Photoshop, you’re the beholder!
Don’t forget to check out this link for more tips to enhance your Photoshop skills. Happy editing!
Transform those photos into glitzy masterpieces, and don’t forget to have fun along the way! Shine on! ✨