How Do You Make Smokey Eyes Makeup? Let’s dive deep into this sultry, head-turning makeup look that’s sure to make anyone swoon. Smokey eyes are not just for those glamorous evenings out; they can be your secret weapon for any occasion! Whether you’re heading to a fancy dinner date or just want to dazzle while running errands, this iconic look can elevate your style to a whole new level. So grab your makeup brushes, and let’s get into all the fabulous details of creating the perfect smokey eyes makeup!
Understanding the Basics of Smokey Eyes Makeup
Creating the perfect smokey eyes makeup is all about understanding the different components that come together to form this stunning look. It’s more than just applying dark eyeshadow and calling it a day. There’s a bit of strategy involved, and we all love a good strategy, right?
Choosing the Right Shades
When wondering how to make smokey eyes makeup, the color palette is your best friend. Traditionally, black, gray, and shades of charcoal are the go-to colors. However, smoky eyes can be versatile! You can opt for browns, purples, or even jewel tones like emerald or sapphire, depending on your mood. Here’s a little color guide to help you choose:
| Color | Vibe | Best For |
|————–|———————————–|————————-|
| Black | Classic and dramatic | Night events |
| Brown | Soft and subtle | Daytime looks |
| Gray | Edgy yet sophisticated | Office or meetings |
| Purple | Bold and fun | Girls’ nights out |
| Jewel tones | Luxe and vibrant | Special occasions |
Pro Tip: For a unique twist, try incorporating a pop of color like navy or deep green into your smokey eyes makeup. It adds personality and brightness to your overall look!
Tools of the Trade
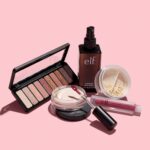
To achieve that sultry, blended smokey eye, you’ll need some essential tools. Dust off those makeup brushes, and let’s see what you’ll need:
- Eyeshadow Brushes: A flat shader brush for packing on color and a fluffy blending brush for diffusing edges.
- Eyeliner: Gel or pencil eyeliner will work wonders for creating depth.
- Makeup Remover: An absolute must for cleanup – and trust me, there will be smudges!
- Eyeshadow Primer: This is crucial for ensuring your smokey eyes makeup lasts all night without fading.
Preparing Your Eyes for Smokey Eyes Makeup
Before diving into the application, prepping your eyes is vital. Think of it as laying the foundation for a fabulous house—everything will be more stable and long-lasting!
Applying Eye Primer
Start with a good eye primer. This little miracle product helps your eyeshadow adhere better and keeps that fierce smokiness from fading away. Apply a thin layer on your eyelids (and under the eyes, too), and watch how it makes every color pop!
Choosing Your Eyeliner
Decide your eyeliner preferences before applying your smokey eyes makeup. Do you want a pencil liner, gel liner, or liquid liner? Each serves different purposes, but a gel liner is great for that sultry look because it glides on so smoothly and can easily be blended. Apply it along your upper lash line, and don’t worry about being perfect yet—it’ll get smudged and smoky!
How to Make Smokey Eyes Makeup Step by Step
Now for the fun part! We’re diving into the step-by-step process of how to make smokey eyes makeup. Brace yourself for fabulousness!
Step One: Base Shadow Application
Using your flat shader brush, apply a neutral base shadow over your eyelid. This creates a lovely canvas for the darker shades. A light beige or soft cream color works perfectly. Don’t forget to blend it well!
Step Two: Adding the Darker Shades
Here comes the magic! Take your favorite dark shadow (hello, black or charcoal!), and apply it on the outer corner of your eyelid. Use your brush to build the intensity. The key is to layer, layer, layer!
Pro Tip: Start off lightly and gradually add more as you go. You can always add more product, but it’s not so easy to take it away!
Step Three: Blending it Out
Using the fluffy blending brush, blend the dark shadow into the crease and slightly upwards. This creates that dreamy, blended smoke effect! Keep blending until there are no harsh lines. Seriously, blending is everything—think of it as a workout for your eyes!
Step Four: Lower Lash Line
Now, let’s work on that lower lash line! Pull out your eyeliner again and gently line your lower lashes. Then, take that same dark shadow and smudge it under the liner! It’s like having a smoky party for your eyes. Blend it all together until you achieve the desired intensity.
Step Five: Highlight the Inner Corners
To brighten up that gorgeous smokey look, grab a shimmering highlight or a light champagne eyeshadow. Dab it onto the inner corners of your eyes and brow bone. This creates contrast and makes your eyes look bigger and brighter. Oh la la!
Finishing Touches for Smokey Eyes Makeup
We’re almost there, ladies! It’s time for the finishing touches that will complete your fabulous smokey eyes makeup look.
Applying Mascara
No smokey eye is complete without mascara! A couple of coats of your favorite volumizing mascara will do wonders. Apply it generously to both your upper and lower lashes for a lush effect.
False Lashes Optional
Feeling extra fancy? Add some false lashes for that wow factor. They elevate any makeup look, especially smokey eyes! Check if they are long enough but not too overpowering so that your lovely smokey effect still shines through!
Makeup Removal Tips for Smokey Eyes
Now that you’re an expert in how to make smokey eyes makeup, let’s not forget how to take it all off! The struggle is real, especially with dark shadows. Here are a few tips to make the removal process a breeze:
- Oil-based makeup remover works best for breaking down those stubborn shadows and liners without much scrubbing!
- Soak a cotton pad with the remover and press it against your eyelids for a few seconds to break up the makeup before wiping it away.
- Follow up with a gentle cleanser to ensure all residue is gone.
Common Mistakes to Avoid When Creating Smokey Eyes Makeup
Even makeup pros can make mistakes from time to time when trying to achieve the perfect smokey eye. Let’s make sure you avoid the common pitfalls!
Overdoing the Dark Shades
Less is often more. Starting light and gradually building up is key to avoiding that raccoon look. So, take your time and have fun with blending!
Neglecting the Brows
Don’t forget those lovely brows! Well-groomed brows frame your eyes beautifully, so make sure they’re filled and defined. A little brow gel goes a long way!
Skipping Setting Spray
Once your masterpiece is complete, set it all with a makeup setting spray. This will keep your smokey eyes looking fresh all night long, even if you’re on the dance floor busting moves.
Not Practicing
Give yourself grace as you practice. The more you try, the more you’ll find your groove! Consider it a makeup dance party—you’ll learn some fabulous moves along the way.
Inspiration from the Stars
Take a page from your favorite celebrities who rock smokey eyes like nobody’s business! Stars like Kim Kardashian and Taylor Swift flaunt this look in unique ways, so don’t hesitate to draw from their glamour as inspiration while creating your very own version!
Conclusion on How Do You Make Smokey Eyes Makeup
Now that you’ve learned the steps and insider tips on how to make smokey eyes makeup, you’re armed with everything you need to create this fierce look. Remember, makeup is all about having fun! Experiment with colors and styles, and don’t be afraid to sparkle. Just follow these instructions, and you’ll soon turn heads wherever you go. With practice and a little flair, you’ll be a smokey eye maestro in no time, darling! For more in-depth tips on makeup artistry, check out resources from Makeup.com and Elle for added inspiration! Now, go get your glam on, gorgeous!