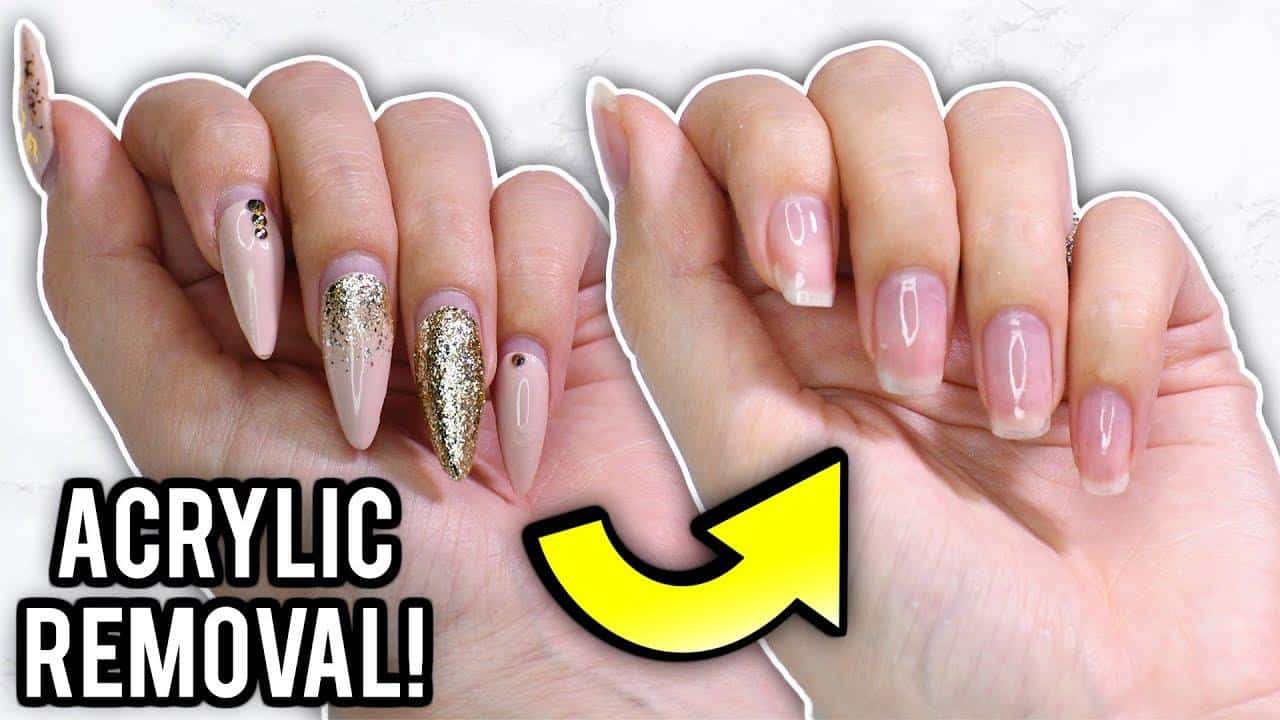
Acrylic nails might make everyone feel like a fabulous diva, but eventually, the time comes when you need to take them off. So, how do you get acrylic nails off with acetone? Worry not, ladies! This guide is packed with all the juicy details you need to safely and effectively remove those glam tips. Put on your favorite playlist, grab your supplies, and let’s dive into this nail-tastic adventure!
Understanding Acrylic Nails and Their Removal Process
To start off our fabulous journey, let’s chat about what acrylic nails are and why you might want to remove them. Acrylics are a mix of liquid monomer and powder polymer that create durable and stunning nails. However, as they grow out, you might start to see some unsightly gaps. And let’s be honest, they can be a bit of a chore to maintain. So, ladies, it’s time for a nail break!
When contemplating how to get acrylic nails off with acetone, understanding the process is key. Acetone is a powerful solvent that effectively breaks down acrylic materials, allowing you to safely remove them without damaging your natural nails. It’s like a magic potion for your fingertips!
Necessary Supplies for Nail Removal
Before you embark on your acetone adventure, ensure you have everything you need. Trust me, the last thing you want is to realize halfway through that you’re missing something important! Here’s a handy list:
- Pure Acetone: The star of the show! Make sure it’s 100% acetone for maximum effectiveness.
- Cotton Balls or Pads: These will be our little soldiers, soaking up all that acetone goodness.
- Aluminum Foil: This helps keep the cotton in place and traps the acetone, making it work its magic.
- Nail File: A gentle nail file can help you gently buff the surface of the acrylics.
- Cuticle Oil or Cream: Post-removal pampering is essential! Treat your cuticles with love afterward.
- Tweezers: You might need these to help lift off stubborn bits after soaking.
- Nail Buffer: For smoothing out your natural nails after removal.
Table 1: Essential Supplies for Acrylic Nail Removal
| Supplies | Purpose |
|---|---|
| Pure Acetone | Removes acrylic nails |
| Cotton Balls/Pads | Soaks in acetone |
| Aluminum Foil | Holds cotton in place |
| Nail File | Buffs surface of acrylics |
| Cuticle Oil/Cream | Moisturizes nails post-removal |
| Tweezers | Helps lift off stubborn acrylics |
| Nail Buffer | Smooths natural nails |
The Step-by-Step Process for Removing Acrylic Nails with Acetone
Now that we have our supplies ready, let’s get down to business! Here’s how to get acrylic nails off with acetone effectively and without any drama.
Step 1: File the Surface
Before soaking your acrylic nails in acetone, you’ll want to file them down gently. This helps the acetone penetrate the acrylic better. Use a nail file to buff the top layer of your acrylics, being careful to avoid damaging your natural nails underneath. You’re looking to remove the shine, darlings, not the entire nail!
Step 2: Soak Cotton Pads in Acetone
Grab your cotton balls or pads and soak them generously in pure acetone. You want them to be saturated but not dripping. If they’re too wet, it can create a slippery mess—yikes!
Step 3: Apply Cotton to Nails
Place the soaked cotton ball on each nail and then wrap a piece of aluminum foil around the tip of your finger to hold the cotton in place. This makes it look fancy and keeps the acetone from drying out too quickly. Plus, it’s a fun little DIY project!
Step 4: Wait Patiently
Now, this is the time for patience, ladies! You’ll want to let the acetone do its thing for about 15 to 30 minutes. During this time, you can sip your favorite beverage, watch a cheesy rom-com, or scroll through your Instagram feed. Just think of it as a mini spa time for your nails!
Step 5: Check the Progress
After about 15 minutes, it’s time to check the progress. Carefully peel back the foil and cotton. If you notice the acrylics are starting to lift, that’s a win! Gently push the acrylics using a wooden stick or tweezers. If they’re still stubborn, no worries. Just reapply the cotton and foil and give it a little more time.
Step 6: Clean Up and Moisturize
Once the acrylic nails have been removed, wash your hands thoroughly to get rid of any acetone residue. Follow it up with some love! Use cuticle oil or cream to hydrate your nails and cuticles post-removal. Your natural nails might feel a bit dry, so pampering is essential!
Aftercare for Healthy Natural Nails
After successfully removing your acrylics, it’s vital to give your natural nails some TLC. They’ve been through a lot, so here’s how you can nurture them back to health:
Hydration is Key
Moisturize those lovely fingers! Apply cuticle oil daily to keep your nails hydrated and healthy. A little love goes a long way, beauties!
Nail Strengthener
Consider using a nail strengthener treatment. This can help fortify your natural nails and promote growth after the stress of acrylics.
Gentle File and Buff
Keep your natural nails trimmed and filed gently. A light buffing can help remove any rough spots without causing trauma to the nail bed.
Limit Polish Use
While it’s tempting to jump straight into the next nail trend, give your nails a break from polish for a week or two. Let them breathe and recover!
Table 2: Aftercare Tips for Natural Nails
| Tip | Details |
|---|---|
| Hydrate | Use cuticle oil daily |
| Nail Strengthener | Apply treatments for growth |
| File and Buff | Trim and smooth natural nails |
| Limit Polish | Give nails a break |
Tips for Success When Removing Acrylic Nails with Acetone
To ensure a successful acrylic nail removal experience, here are some fabulous tips to keep in mind:
Choose the Right Acetone
Always opt for 100% pure acetone for the best results. Non-acetone removers just don’t have the same efficacy when it comes to acrylics.
Patience is Virtue
Don’t rush the process! Giving enough time for the acetone to soak is vital to minimize damage to your natural nails.
Avoid Water Exposure
Before your removal session, try to avoid soaking your nails in water. Less moisture means the acrylics will hold together better, making removal easier.
Keep Your Workspace Clean
A well-organized workspace makes a big difference! Set up a cozy spot with all your supplies handy to ensure a smooth removal process.
Consult a Professional
If you find that removing acrylics at home feels like rocket science, don’t hesitate to visit a nail salon. Professionals are trained to remove them safely and efficiently.
Conclusion on How to Get Acrylic Nails Off With Acetone
Now that we’ve wrapped our manicured fingers around the nitty-gritty of how to get acrylic nails off with acetone, it’s time to celebrate your newfound knowledge! Whether it’s strutting your natural nails or diving into the next nail art endeavor, you’re now equipped to face the world of nails with confidence. Remember, a little pampering goes a long way, and your nails deserve all the love and care they can get!
For more information and great insights on nail care, check out Healthline’s Nail Care Tips and get fabulous! Your nails are your canvas—so make sure you treat them with kindness!